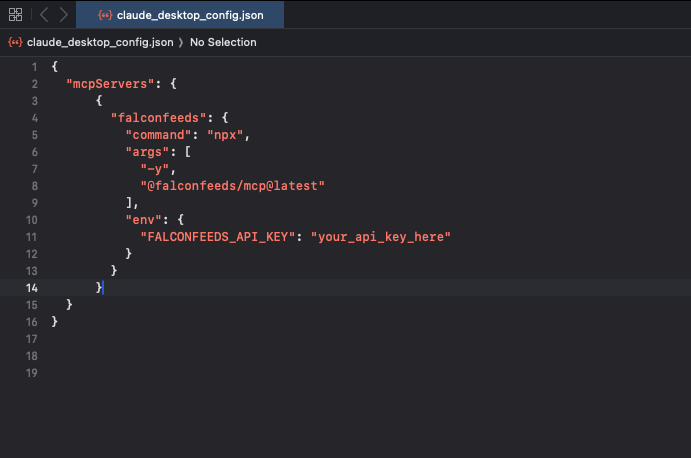
Running with NPX
Recommended for most users. Add the following configuration to your MCP client:your_api_key_here with the API key you obtained from your FalconFeeds account.
Running from Source
For more control or customization, you can run the MCP server from source.-
Clone the repository:
-
Navigate to the project directory:
-
Install dependencies:
-
Build the project:
-
Configure your MCP client with the path to the built server:
Setting Up in Claude Desktop
What You Need
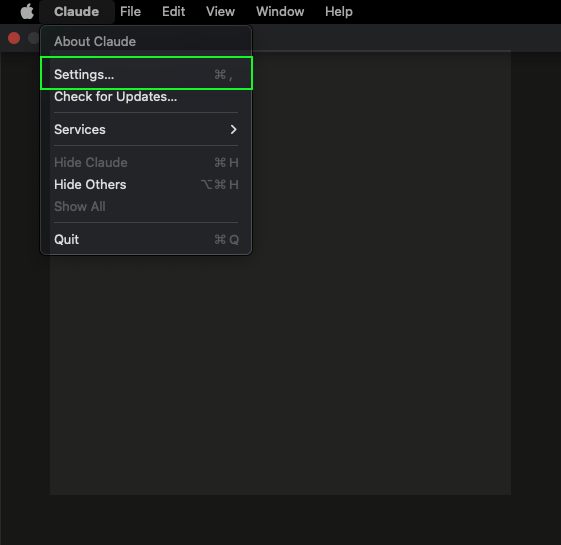
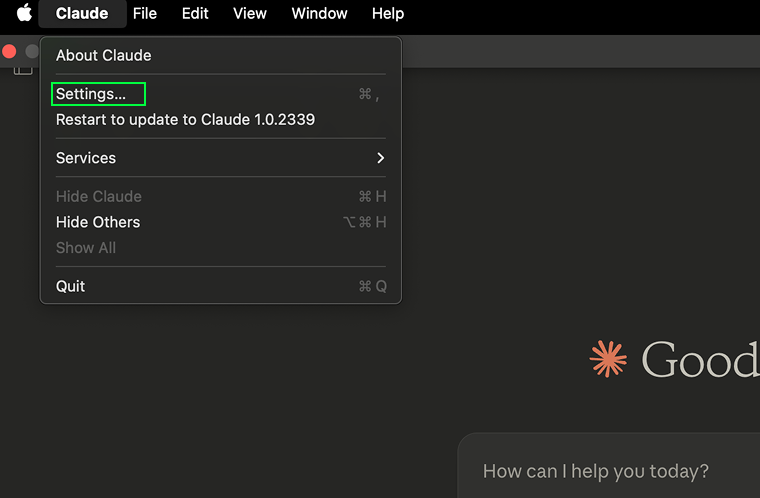
- Install Claude Desktop and click on Settings.
- You’ll need the latest FalconFeeds MCP extension file:
Download FalconFeeds MCP Server (.mcpb)
Get the latest
.mcpb extension file to install into Claude Desktop.Installation
Install the FalconFeeds MCP Server using one of the following methods:- Using extension
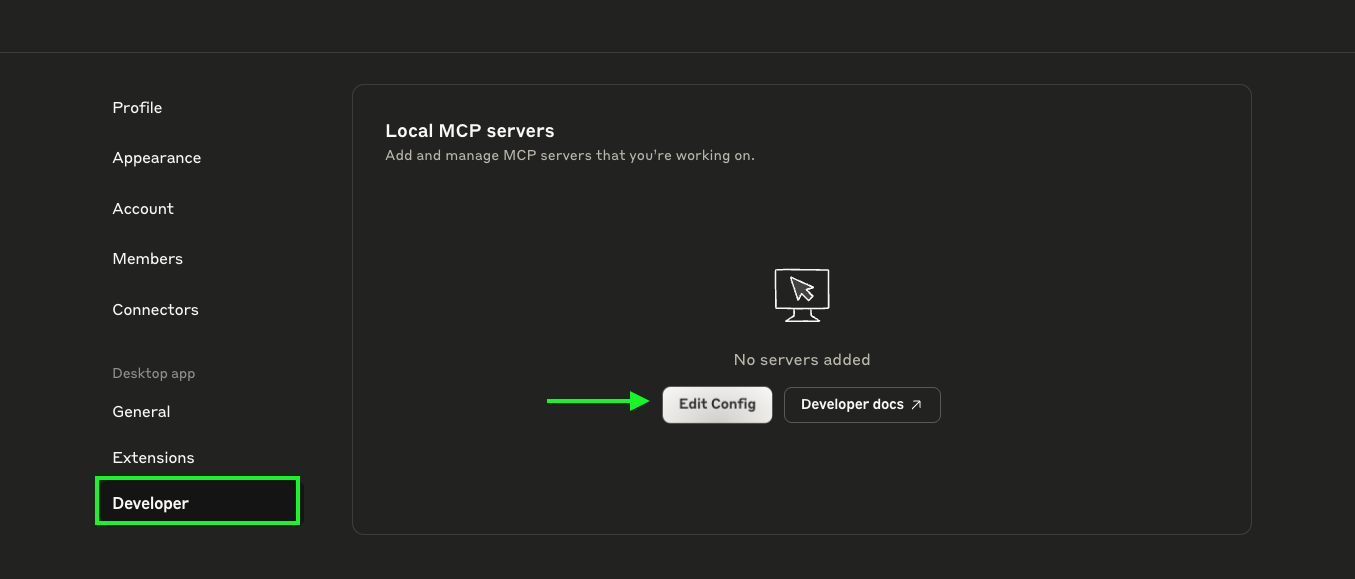
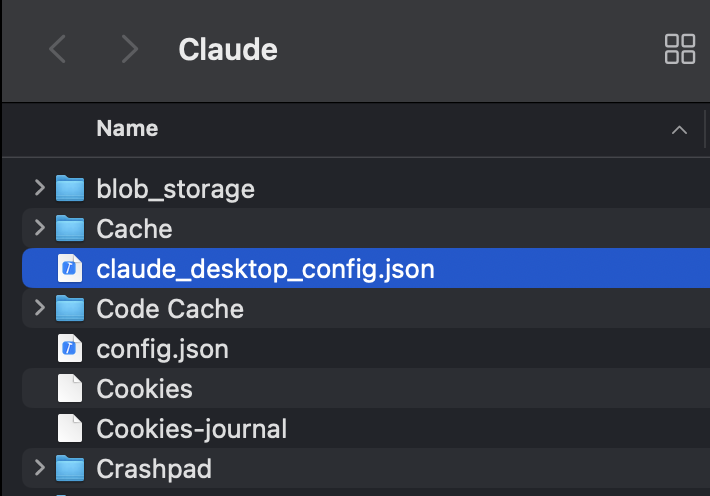
- Manual Config
1. Double-Click Install (Quickest)
- Download the
.mcpbfile using the button above. - Open your Downloads folder.
- Double-click the
.mcpbfile. - Claude Desktop opens automatically and shows an install prompt.
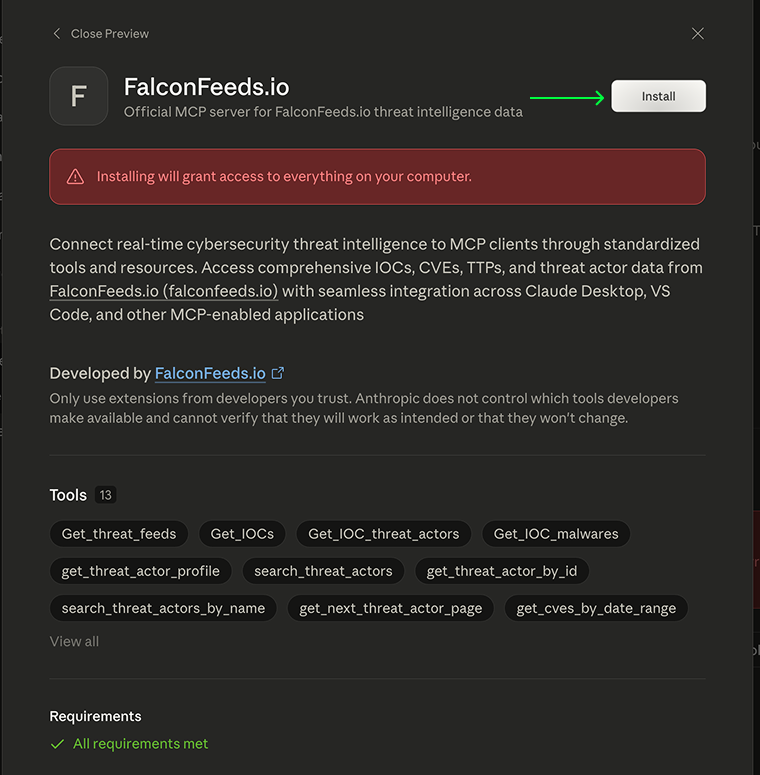
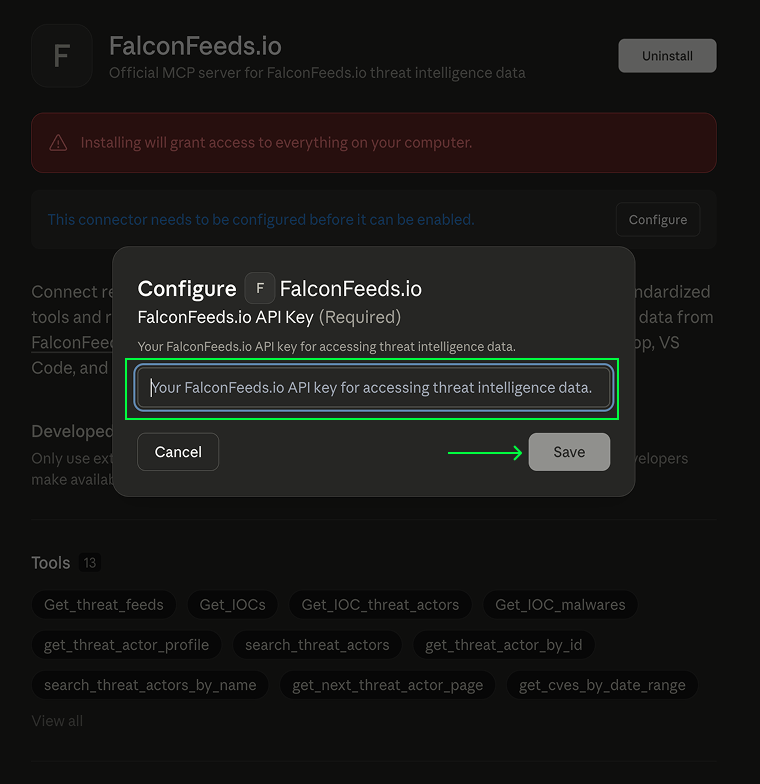
- Click Install, then enter your FalconFeeds API Key.
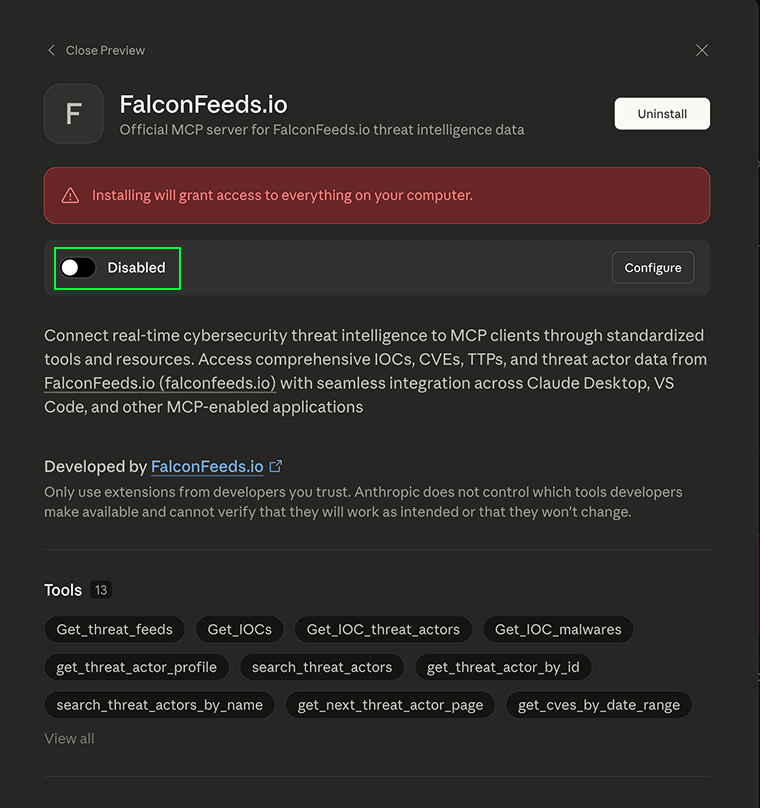
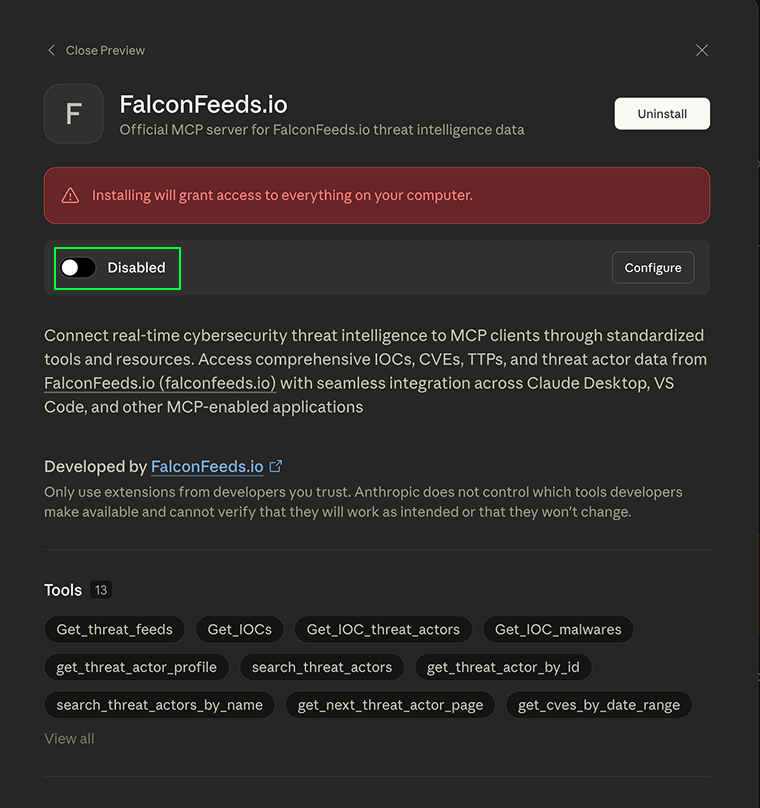
- After installation, click Enable to activate the extension.
2. Install Extension
- Download the
.mcpbfile using the button above. - Open Claude Desktop and click on Settings.
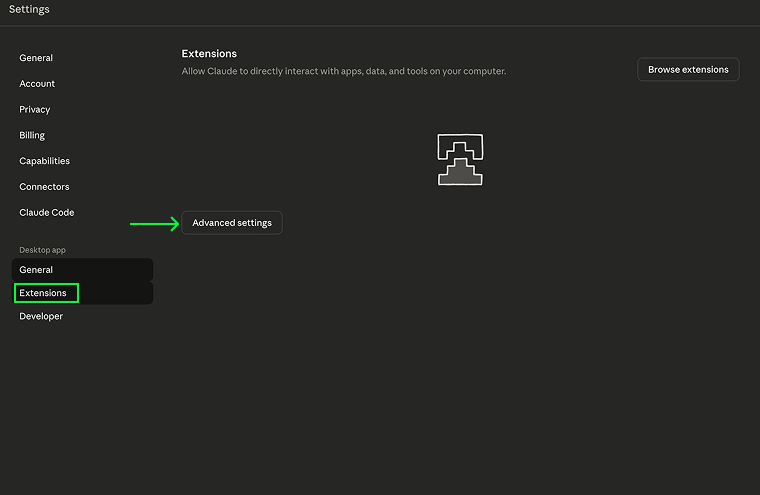
- Click on the Extensions tab and then Advanced settings.
- Click on Install extensions.
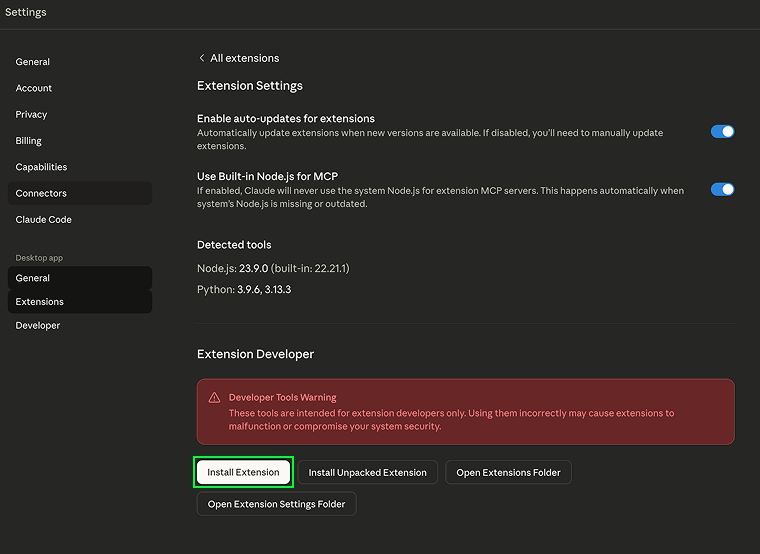
- Select your downloaded
.mcpbfile. - Click Install, then enter your FalconFeeds API Key.
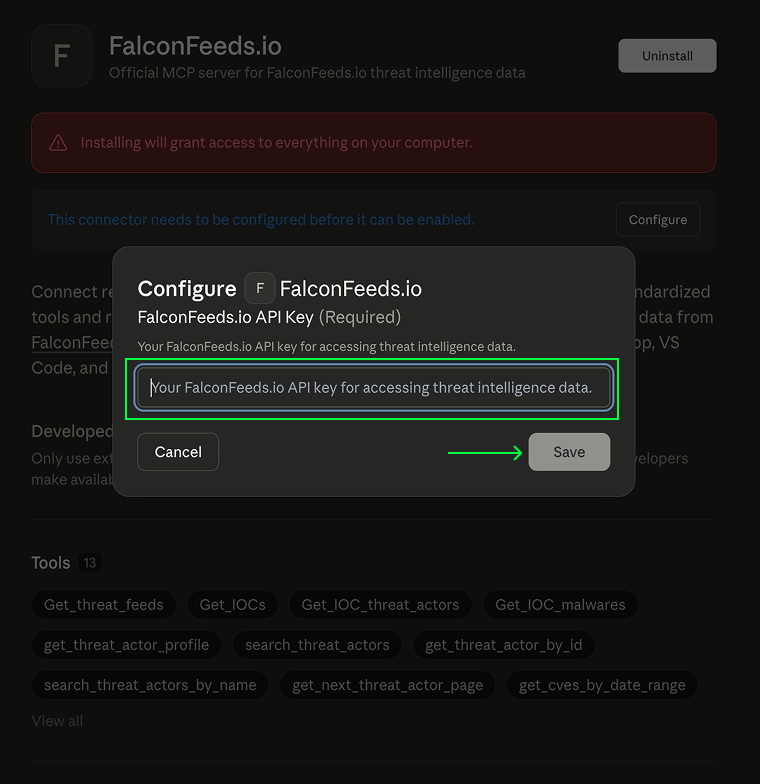
- After installation, click Enable to activate the extension.